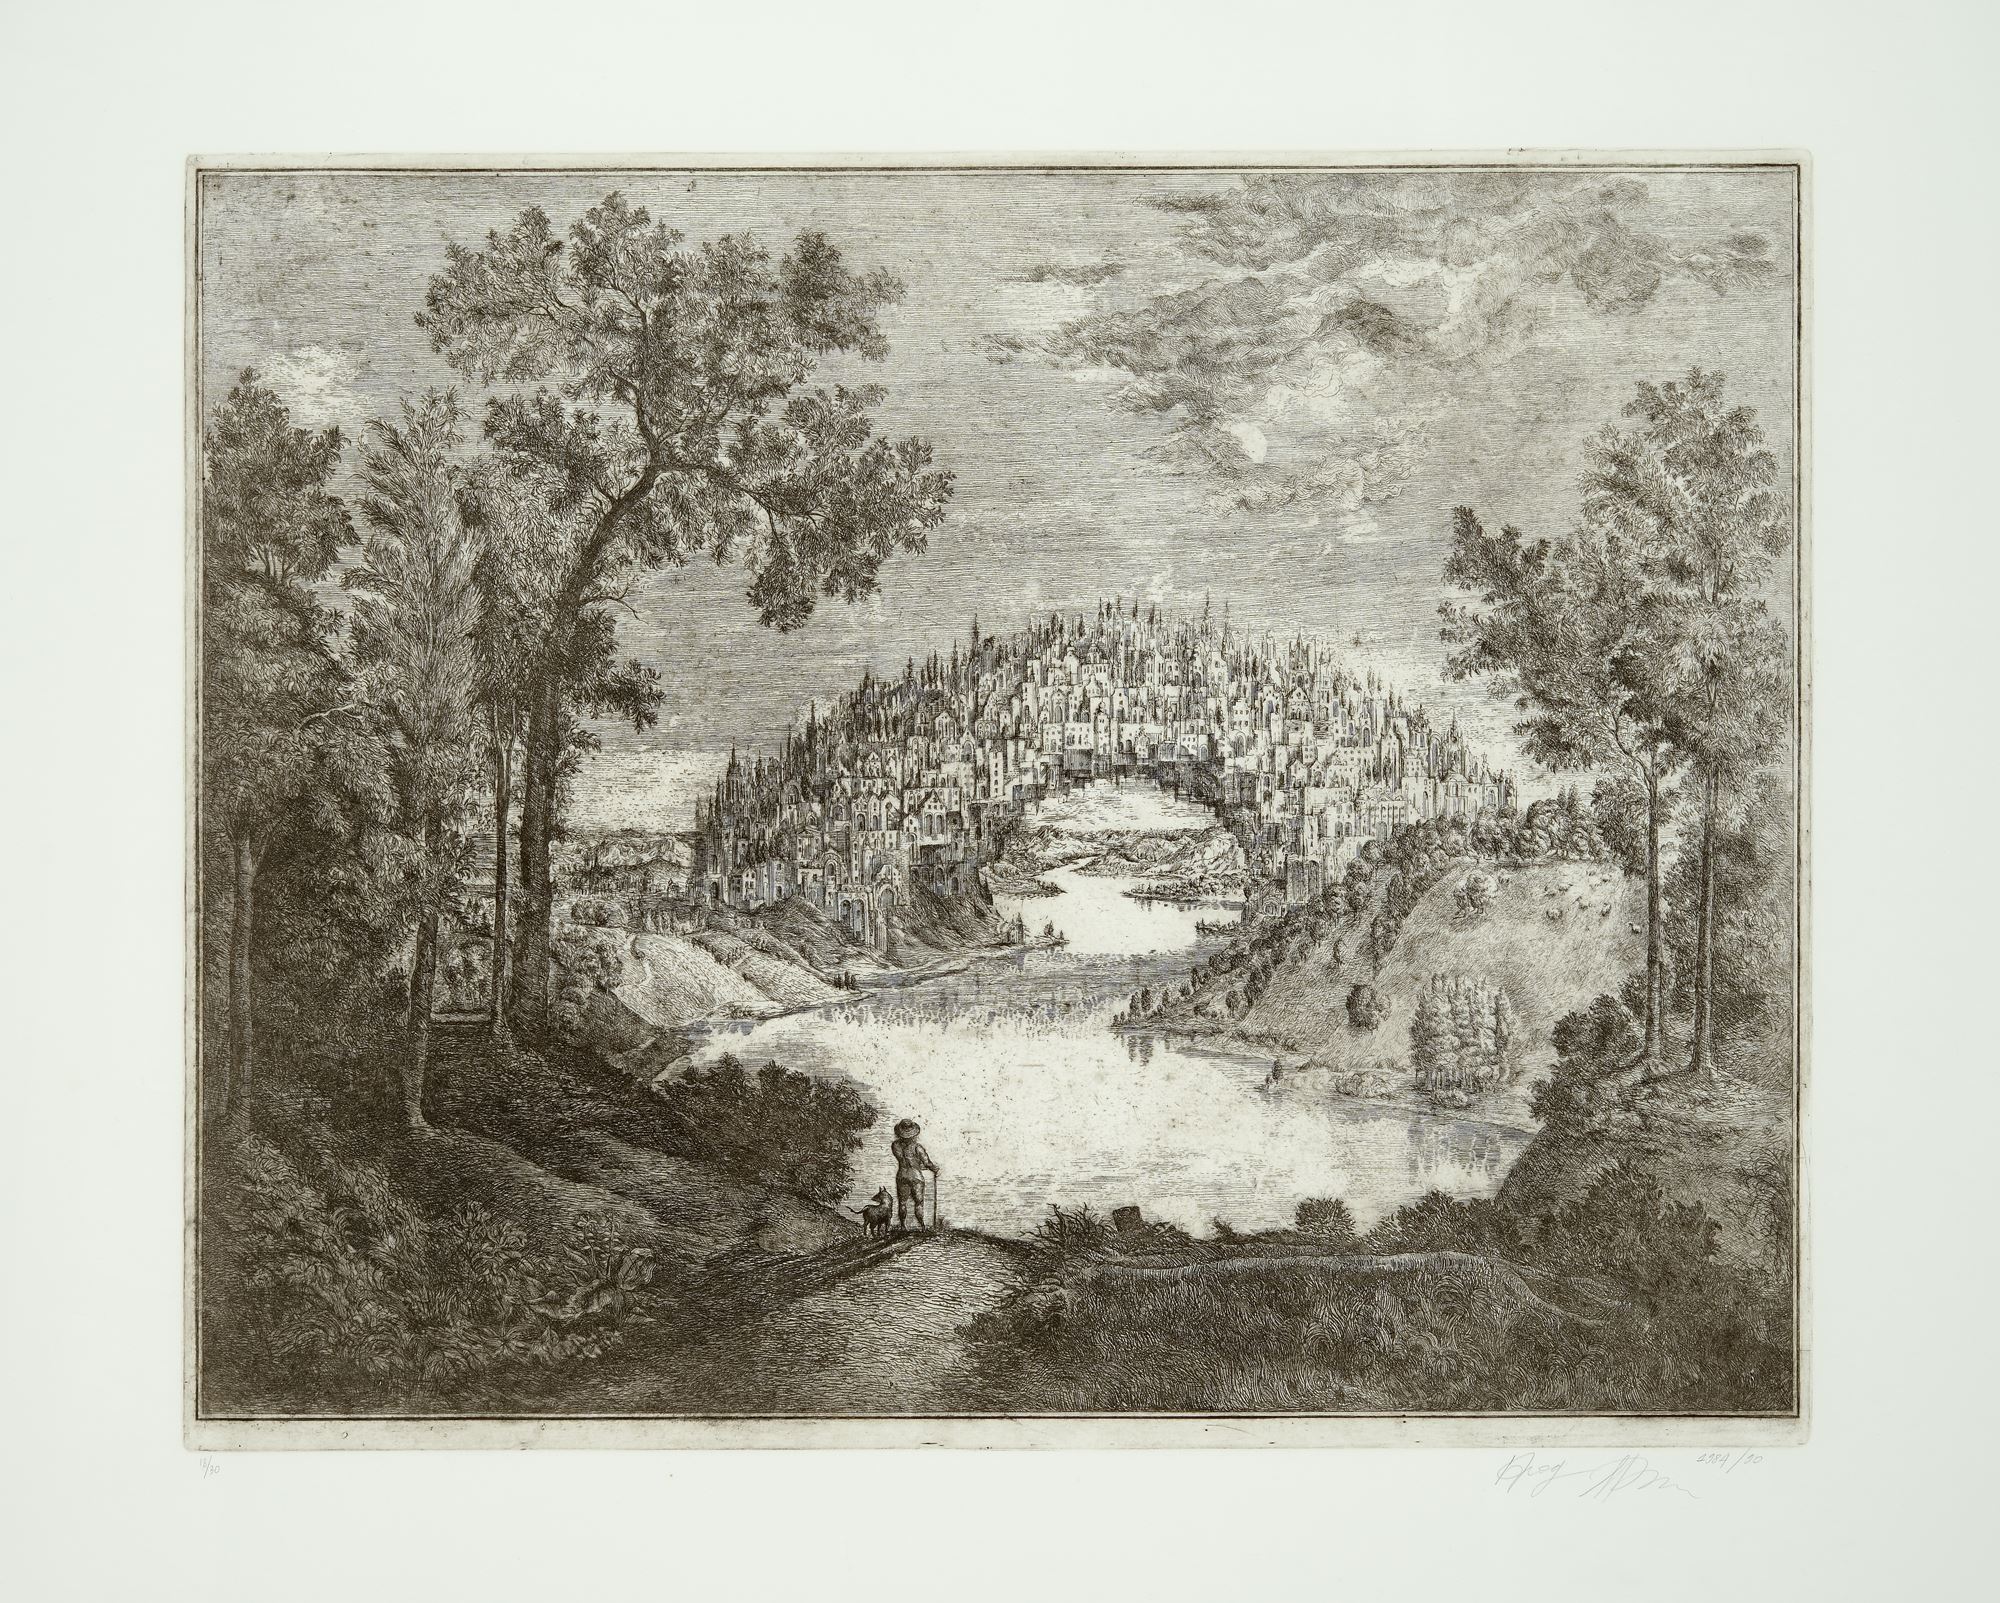
• Town Bridge

    Brodsky and Utkin, Town Bridge. Etching on paper, 31 x 42 inches. Collection of the Nasher Museum of Art at Duke University.

Cities Around the World

Visual Arts

Grade 1

6: Around the World with a Glass Slipper

5 45-minute lessons

printmaking


How can I collaborate with my classmates to create artwork?
What are the similarities and differences between cities in artwork and around the world?


I can tell the difference between old and new buildings.
I can make a printing plate.
I can work in a group.
I can make more than one print with ink.
I can tell you what a brayer and a printing plate are used for.
Nasher Museum of Art at Duke University

Day 1

Lead students in viewing and discussing photos of cities from around the world. They can also view famous architectural feats like the Great Wall of China, the Colosseum, the Leaning Tower of Pisa, the Eiffel Tower, Impei, Falling Water, and the Empire State Building.

Display and have students view the print Town Bridge by Alexander Brodsky. Ask open-ended questions:

  • What’s going on in this print?
  • What do you see that makes you say that?
  • What more can we find?

Demonstrate one way to design and draw a building, reminding the students that there is more than one solution to this artistic problem.

Lead the students in brainstorming different parts that need to be included for the building to be functional. Help direct the conversation by generating open-ended questions. For instance, “How will people get into this building?”

Have students draw their own buildings.

If there is time at the end of class, students can compare and contrast two of the buildings (one historic and one contemporary) with a Venn Diagram.

Day 2

Demonstrate how to transfer the building drawing to a styrofoam printing plate:

  1. Place your drawing against a flat piece of styrofoam (such as a deli tray with its edges cut off).
  2. Use a blunt pencil to trace the lines of the drawing, creating an impression in the styrofoam below. Press firmly enough to create a noticeable marking in the styrofoam but not so firmly that the styrofoam breaks.

Demonstrate the printing process and introduce students to the tools that they will be using:

  1. Place a small amount of ink in a printing palette. Any smooth, flat, non-porous surface works well.
  2. Evenly coat the brayer by rolling about an inch of ink on the printing palette. Be sure the ink isn’t too thick or too thin.
  3. Once the brayer is inked, roll it onto the prepared styrofoam printing plate.
  4. When the brayer is dry, coat it once again with ink from the printing palette and continue to ink the printing plate, this time rolling the brayer in a different direction.
  5. Once you have an even coat of ink on the printing plate, place a piece of paper on top of it and rub it firmly to transfer the ink.
  6. Peel the paper from the plate and examine the finished print.

Day 3

Review the printing process and begin printing in groups. Remind students to add their names and a number to each print.

Day 4

Review the names of printing tools. Finish printing individually and work as a team to print on one very large sheet of paper to form a city.

Day 5

Facilitate students in creating a background for their city. Possibilities for coloring a background include color sticks or pastels.

Classroom Extension Ideas

An imaginary city is ripe with opportunities for narrative writing! For a quick activity, have students write a postcard to a friend describing a weekend they spent visiting this city. What was different about life there? Did they encounter anything unusual during their stay?

Materials Needed

printing plates, ink, brayers, printing palettes, images depicting different style of architecture in cities around the world

Vocabulary

brayer, printing plate, printmaking

Artwork in this Lesson

  • Nasher Museum of Art at Duke University
    • Brodsky and Utkin | Town Bridge